Understanding the Extruder Tarantula
The Extruder Tarantula, often associated with the Tevo Tarantula 3D printer, is a crucial component for 3D printing. Understanding its function and how it interacts with other parts of the printer is key to achieving successful prints. This guide will delve into the Extruder Tarantula, providing valuable insights and tips to improve your 3D printing experience. Whether you’re a beginner or an experienced user, knowing how to properly use and maintain your Extruder Tarantula can significantly enhance print quality and reduce frustrations. The Extruder Tarantula’s role is to melt and extrude filament, creating the three-dimensional object layer by layer. Proper understanding is crucial for achieving the best printing results.
What is an Extruder Tarantula?
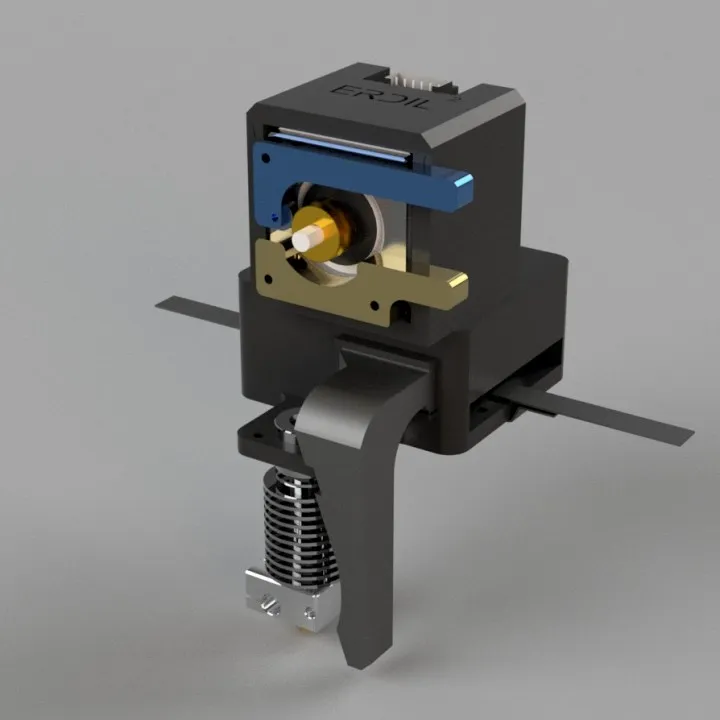
The Extruder Tarantula is the mechanism responsible for feeding the 3D printing filament into the hot end, where it is melted and extruded through the nozzle. It typically consists of a stepper motor, a hobbed gear or drive gear, and a set of bearings or idler wheels that grip the filament. The design can vary, with direct drive extruders being mounted directly on the hot end and bowden tube systems placing the extruder further away. Tevo Tarantula models use different extruder setups, often using a direct drive approach. This setup ensures precise control over filament feeding, which affects the quality of your prints. Knowing how the Extruder Tarantula works is a crucial step to maintaining it.
How Does the Extruder Tarantula Work?

The Extruder Tarantula works by using a stepper motor to rotate the drive gear, which then pushes the filament towards the hot end. The drive gear, often a toothed wheel, grips the filament, ensuring a consistent feed. The idler wheel or bearing applies pressure to the filament, pressing it against the drive gear. This mechanism, when correctly calibrated and maintained, provides accurate and reliable filament extrusion. As the filament is pushed forward, it reaches the hot end, where the nozzle melts it, and the printer deposits the molten plastic onto the build plate in a precise pattern. Any malfunction or misalignment in this system can affect print quality. Proper maintenance ensures the best results, so taking care of your Tarantula Extruder is necessary.
Top 5 Tips for Extruder Tarantula Printing Success
Achieving successful prints with your Extruder Tarantula involves more than just assembling the printer. There are multiple areas to take care of, and improving those will make a huge difference. Here are five essential tips to help you optimize your printing process and avoid common issues, making the most of your 3D printing experience and improving your prints. These tips are designed to guide you through key aspects, from calibration to maintenance, ensuring that your Extruder Tarantula delivers consistent, high-quality results, which is very important when it comes to 3D printing.
Tip 1 Calibrating Your Extruder
Extruder calibration is a fundamental step in ensuring accurate filament extrusion. Correctly calibrating your Extruder Tarantula guarantees that the printer dispenses the right amount of filament, leading to precise dimensions and high-quality prints. Without proper calibration, you can face issues such as under-extrusion, which results in weak layers, or over-extrusion, which leads to blobs and defects. Calibration is not a one-time process; it should be performed regularly, especially after changing the filament type or making hardware adjustments, ensuring the best possible results from your 3D printer.
Why Calibrating Is Important

Calibration directly affects the dimensional accuracy and structural integrity of your prints. Incorrect extrusion can result in parts that are either too small or too large, making them unusable for their intended purpose. Calibrating the extruder ensures that the printer dispenses the correct amount of filament, which provides the correct layer adhesion and overall strength. Moreover, accurate calibration helps prevent common printing defects such as gaps, weak layers, and inconsistencies in the surface finish. Regular calibration is a proactive step to maintain print quality.
How to Calibrate
The calibration process typically involves measuring and adjusting the steps per millimeter (mm) setting in your printer’s firmware. First, you’ll need to measure how much filament the extruder feeds when instructed to extrude a certain length (e.g., 100mm). Then, you will compare the measured value to the expected value. Any difference is used to calculate the new steps per mm value, which you will enter into your printer’s firmware. Many tutorials and calculators are available online to guide you through this process. Always double-check your settings to ensure accurate results. A well-calibrated Extruder Tarantula ensures the best printing results.
Tip 2 Proper Bed Adhesion
Ensuring proper bed adhesion is critical for successful 3D printing. This is the first line of defense against print failures. If the first layer doesn’t stick to the bed, the entire print will likely fail. Issues with adhesion often manifest as warping, where the edges of the print lift off the bed, or the entire print detaches during printing. There are multiple techniques to help with bed adhesion, from leveling the bed to using the right materials, all of which will enhance the printing results. Proper bed adhesion is a must for having a better printing experience.
Why Bed Adhesion Matters

Strong bed adhesion is crucial because it keeps the print firmly in place during the entire printing process. The 3D printing process involves applying molten plastic onto the bed. The parts need to stay in place as they cool and solidify. Poor adhesion can lead to warping, where the corners of the print curl upwards. Warping is a common issue. It causes dimensional inaccuracies and can ruin the print. Without proper bed adhesion, the print can detach from the bed, leading to a failed print. Taking care of the bed adhesion issues is a must, so you have a good experience.
Techniques for Improved Adhesion
Several methods can improve bed adhesion. First, ensure the bed is level and clean. An uneven bed can prevent the first layer from adhering properly. Using an adhesive like glue stick or specialized 3D printing bed adhesives can also help. Adjusting the first layer height in your slicer can optimize the first layer to make it stick better. A slightly squished first layer often improves adhesion. For some materials, such as ABS, using a heated bed is essential. A heated bed maintains the temperature of the print and allows it to stick. By combining these techniques, you can significantly improve the success rate of your 3D prints. Also, consider using a brim or raft if adhesion remains a problem.
Tip 3 Optimizing Print Settings
Fine-tuning your print settings is essential for achieving optimal print quality. Different filaments, designs, and environmental conditions require different settings to produce the best results. Print settings such as temperature, speed, and retraction are critical in determining the final outcome of your prints. Experimenting with these settings can reduce defects such as stringing and warping and improve dimensional accuracy. Optimizing your print settings will take some time, but the time investment is worth it. This will save you time and material in the long run. There are many options for setting up the best printing experience, so having some knowledge is important.
Temperature Settings

Temperature settings are crucial. The ideal printing temperature varies depending on the filament type. For example, PLA typically prints at a lower temperature than ABS. When the temperature is too low, the filament may not melt sufficiently, leading to poor layer adhesion. When the temperature is too high, you may experience stringing, oozing, and a loss of fine details. It’s essential to consult the filament manufacturer’s recommendations for the best temperature range. It’s also a good idea to perform temperature tests to find the optimal range for your specific filament and printer. Finding the perfect temperature will increase print quality.
Speed Settings
Print speed is another critical factor in print quality. Printing too fast can cause issues, such as under-extrusion, poor layer adhesion, and inaccuracies. Printing too slowly can increase print time and may not be the most efficient. The optimal print speed depends on several factors, including the type of filament, the complexity of the print, and the capabilities of your printer. Generally, it’s best to start with a slower speed and gradually increase it. Fine-tuning the printing speed can significantly improve the dimensional accuracy and surface finish. Consider using different speeds for different parts of the print. Finding the best settings will help with printing quality and experience.
Tip 4 Filament Selection
Choosing the right filament is crucial for successful 3D printing. There are various filaments available, each with its unique properties and applications. Selecting the appropriate filament depends on your project’s requirements, considering factors like strength, flexibility, temperature resistance, and ease of printing. Different filaments have different printing requirements, so selecting the best one is crucial. Understanding the properties of each filament will help you to make informed choices. Proper filament selection ensures that your prints meet your requirements. It also ensures the best printing results and the best printing experience.
Choosing the Right Filament

Common 3D printing filaments include PLA (Polylactic Acid), ABS (Acrylonitrile Butadiene Styrene), PETG (Polyethylene Terephthalate Glycol), and TPU (Thermoplastic Polyurethane). PLA is a popular choice for beginners due to its ease of use and low printing temperature. ABS is known for its durability and strength, making it suitable for functional parts. PETG combines the properties of both PLA and ABS, offering good strength and flexibility. TPU is a flexible filament, ideal for creating flexible items. The best filament choice depends on your project’s specific needs and desired properties. Consult the properties of each filament to choose the best results.
Filament Storage
Proper filament storage is essential to maintain the quality of your prints. Filaments, particularly hygroscopic ones like PLA and PETG, can absorb moisture from the air. This absorbed moisture can cause various printing issues, such as bubbles, stringing, and reduced layer adhesion. Storing your filament in a dry environment is essential to prevent moisture absorption. Airtight containers with desiccant packs, such as silica gel, are ideal for filament storage. Keeping your filament dry ensures consistent and high-quality prints. Proper storage is critical to maintain printing results.
Tip 5 Regular Maintenance
Regular maintenance is essential for keeping your Extruder Tarantula and your 3D printer in top condition. Routine maintenance ensures that the printer operates smoothly and consistently, which prevents breakdowns and ensures the best printing results. From cleaning the nozzle to checking the belt tension, regular maintenance extends the life of your printer. It also ensures your printer delivers the results you expect. Make sure that you regularly maintain your Extruder Tarantula.
Nozzle Cleaning
The nozzle can become clogged over time due to the build-up of degraded filament or debris. A clogged nozzle can lead to printing failures. To prevent this, you should regularly clean the nozzle. There are several ways to clean the nozzle, including using a needle or a specialized nozzle cleaning tool. Heating the nozzle before cleaning helps to melt any debris. Another method involves performing an atomic pull or cold pull, which involves heating the nozzle, extruding some filament, and then manually pulling the filament out to remove any debris. A clean nozzle ensures smooth filament extrusion. Regularly maintaining your nozzle will improve the printing results.
Belt Tensioning
The belts on your 3D printer, including those on the Extruder Tarantula, can stretch over time. Loose belts can cause print inaccuracies and other issues. Regularly check the belt tension, and adjust it as needed to ensure optimal printing performance. The belts need to be tight but not overly tight. Over-tightening the belts can damage the printer’s components. Tighten the belts to a point where they’re taut but not excessively stretched. Proper belt tension ensures accurate and reliable movements. Regularly check the printer components to make sure all the settings are correct.
Conclusion
Mastering the Extruder Tarantula is key to a fulfilling 3D printing experience. Proper calibration, bed adhesion, optimized print settings, filament selection, and regular maintenance are all critical components. By implementing the top 5 tips discussed in this guide, you can improve your print quality and overall printing success. Regularly maintaining your printer and following these guidelines will significantly improve the results. With these tips, you will be able to make great prints. So, start printing now, and don’t hesitate to experiment. With a little practice and patience, you’ll be well on your way to producing high-quality 3D prints consistently. Happy printing!